Feeds:
Posts
Comments

A couple weeks ago, my husband and our friend went to a football game, but our friend’s babysitter fell through at the last minute. So, I gladly took the opportunity to hang out with a couple of the cutest and sweetest little boys I know. Lucas (age 5) and Caleb (age 3) are so much fun. Caleb has been obsessed with his Superman costume that his awesome mamma made for him for Halloween, so that’s what he was wearing when we decided to head down to the park. And I’m so glad because it made for some really fun photos. But Caleb isn’t nearly the camera ham that his older brother, Lucas is. I couldn’t get enough of either of them. So without further ado, here they are:

This slideshow requires JavaScript.

pssst. If you click on any of the pictures, it’ll take you to a gallery where you can see all these photos bigger and better!

A few days ago, I told you about my new camera and gave you a peek at the first photo shoot of Bridget I used it for (see that here). After a few long nights of processing, I’m back with the whole album. So without further ado, here it is:

(Psst. If you click on any of these photos, it’ll open a photo viewer where you can see them bigger and better. Try it. It’s good stuff.)

I’m so grateful to Chrysa for including me in her Etsy Treasury. There are so many lovely items all gathered in one place. Here’s a look. And if you want to go directly to my Etsy shop to see my other products, you can click here.

‘Yellow night’ by mualokoukoutsi


Ceramic Pig Planter Vintage …

$29.99

Cyber Monday , Black Friday …

$20.00

Yellow and purple knitted be…

$20.00

Giraffes 8X10 giclee YELLOW …

$25.00

Felt Birds Garland (Yellow)

$12.00

Basket hand woven ocra golde…

$24.00

Mustard Yellow Leaf Patterne…

$12.00

Color Progression Felt Neckl…

$36.00

Yellow Bowl with Salt Molecu…

$25.00

Single hand block printed ca…

$4.00

Yellow Polka Dot Pouch/Clutc…

$4.00

Hand dyed yarn, Golden Yello…

$14.00

Good Day Sunshine Yellow Ray…

$26.00

Sunflower Yellow Soft Leathe…

$98.00

Yellow and Gray Modern Birch…

$17.00

Pillows Chevron PIllows Pill…

$24.00

Treasury tool by Red Row Studio.

I really couldn’t be more excited to have gotten a new camera! My husband and I decided to use some of our wedding gift money to make the purchase. After some research, we decided on the Nikon D5100, and so far, I think I’m in love.

I’m hoping to start a part-time photography business doing portraits for families, couples, and individuals. I’ve got a little work to do before I’m ready to officially start, but James Taylor (no, not that James Taylor, though I like him, too) from Outlaw Photography and PartTimePhoto.com has given me the resources and encouragement I needed to make the decision to work towards this goal.

And I’m lucky to have a friend and co-worker who is gorgeous and just starting to pursue modeling. We’ve both been practicing our respective skills on each other, and yesterday I had the pleasure of using my new camera at a really fun photo shoot of Bridget. I still have some processing to do, but I picked a few favorites and edited them each a few different ways. Culling down the 500+ photos is definitely the hardest part of the process for me. I’m working on it.

So here is a peek at yesterday’s shoot. I really love what I have so far! Let me know what you think. I’d love some feedback and/or photography advice, whether technical or business oriented. And as the main differences in these edits is the coloring (how much or how little saturation and/or color vs. black and white), I’d love to hear which style you like best. I like them all so much, I can never decide which to go with. Please, please, help me decide!

(Hint: If you click on any of the thumbnails below, you can see a bigger and better version of these photos in a gallery format.)

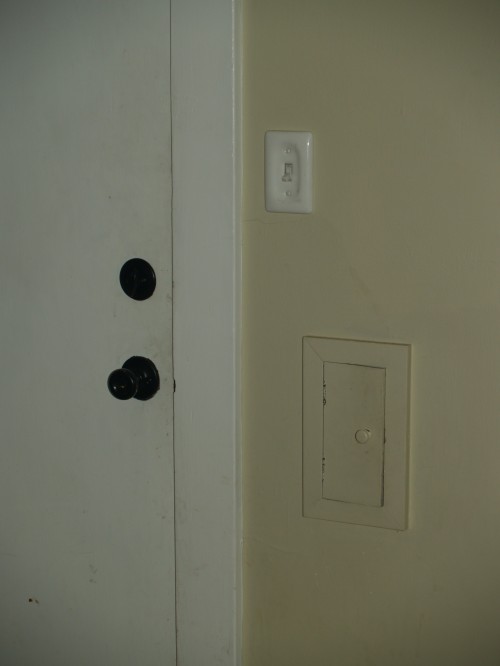
My house was built in 1928, and along with tiny closets and plaster walls, that means charming details. One of my favorite of those details is our mailbox. It’s actually a little mail chute with a little mini-door next to the front door. See:

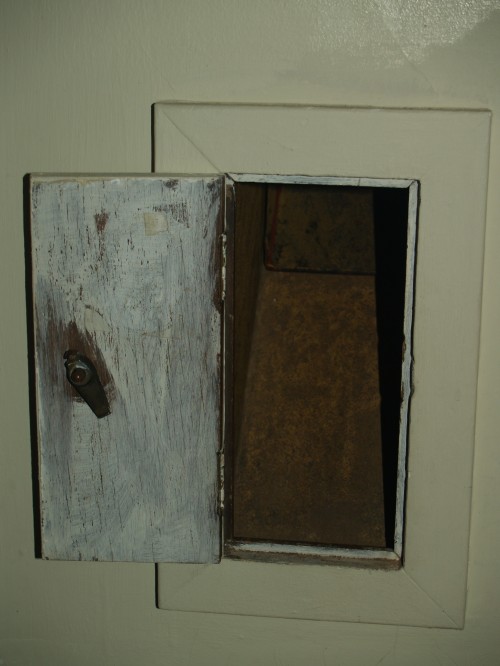
Here’s a closer view:

It’s super convenient to get the mail, seeing as I don’t even have to open my front door. And when our friends with kids come over, the little ones L-O-V-E that little door. My husband likes to tell them that tiny pirates live inside. Yeah, he’s that guy. And they love him.

But the other day, I got the mail and didn’t shut the mailbox. A little while later, I looked over from my perch on the couch and saw this:

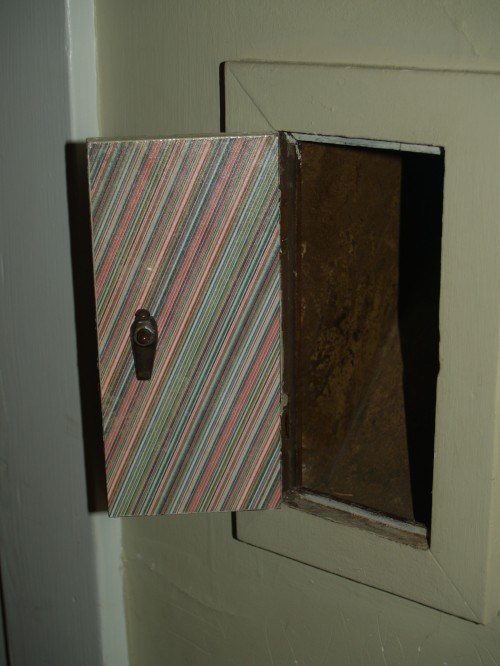
I’ve lived here for a year and a half, and as many times as I’ve gotten the mail, the inside of the little door — with paint slapped on in what looks like an afterthought — never really bothered me. I guess it was mostly because the little door was always shut, hiding the slack paint job from my eyes. And who cares if the back of the mailbox door looks kind of crappy, right? But for some reason, that day, I cared. And not only did I care, but I actually did something about it. I grabbed my book of scrapbook paper and picked a patterned paper that is fun, but not too crazy. Who doesn’t love some stripes?

Then, I measured the back side of the mailbox door and cut the paper to size and put a hole where the “door knob” gets screwed in.

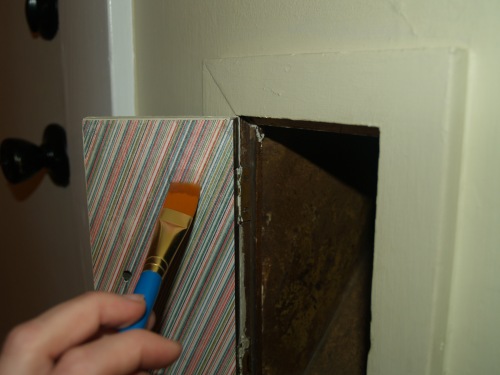
I used some paper glaze and a paintbrush to glue the patterned paper to the back of the door.

Once it dried, I painted another layer of glaze on top of the paper to seal it.

It looks really glossy in the next picture, but that’s just because the glaze is still wet.

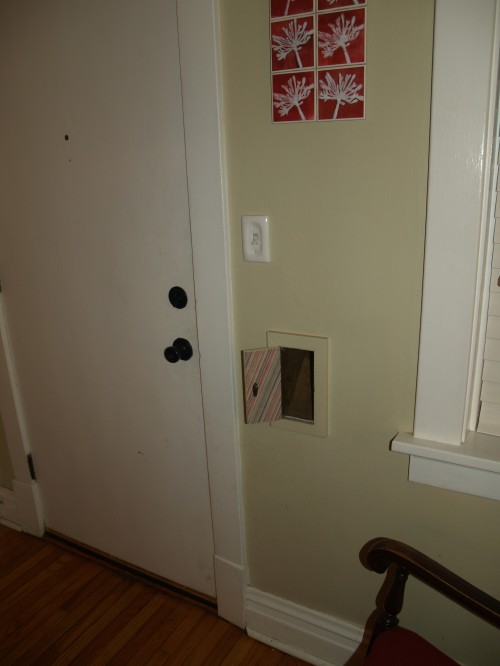
I waited until it dried, then replaced the little mini door knob and stepped back to admire my mini makeover.

It’s just a small thing that took very little time and effort, and it’s hidden 99 percent of the time, but it makes me happy.

Have you tackled any “hidden” projects lately that make you happy? Let me see. Please.

Pins in place

I use bobby pins all the time. Not every day, but close. And somehow, it always seems like once I put a bobby pin in my hair, it becomes practically disposable. I don’t have a home for bobby pins, so they end up in random spots and I can never find them when I need them, so I grab some new ones instead. It’s not a good system.

So, I thought this was one of the simplest and most brilliant things I’ve ever seen (originally from here):

To be honest, it never really occurred to me that bobby pins are magnetic. Once I saw this, I got right to it. Since I generally do my hair in front of the medicine cabinet, that’s where it seemed like I should corral my bobbies. So I went from this, before:

And with a couple of strips of adhesive-backed magnets and about three minutes…

I had a place for my bobby pins to land when I take my hair down at the end of the day:

Here’s a closer look:

And one more close-up, for good measure:

It was one of the easiest organization projects I’ve ever done. And it’s easily hidden away behind the medicine cabinet door. How about you? How do you keep your bobby pins organized? Or other hair supplies? Have any great secrets of organization I should know about? I could use ’em.

I have jewelry boxes. Two of them, in fact. And you might think that would mean organized jewelry. Two words. Ha. Ha. The thing is, when my jewelry is hidden away in little drawers and cabinets, I don’t wear it. So I inevitably wear a pair of earrings, then take them off and set them on top of the jewelry box at the end of the day. Eventually, I have a little pile of earrings that I chose from when it comes time to adorn my ears in the morning, completely ignoring all the earrings tucked away inside the jewelry box, out of sight.

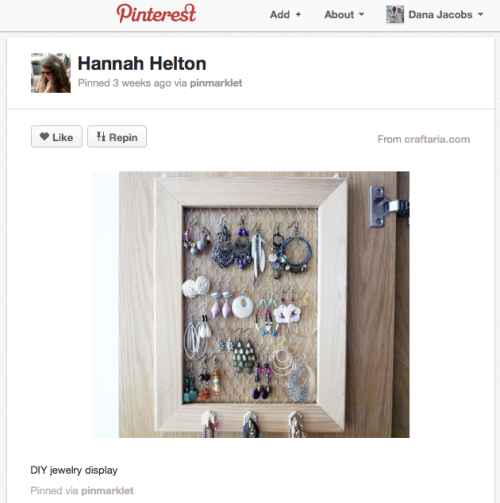
So all the inspiring jewelry displays on Pinterest got me excited. There are so many creative ideas to make functional art out of organizing jewelry. Ideas like this (originally from here):

And this (originally from here):

And this (originally from here):

And this (originally from here):

So a while ago, I picked up some old frames from a thrift store and got out the spray paint.

Valspar has spray paint in a color called “New Avocado.” It’s the same color that I used as the accent on the headboard that I painted, shown here. (Though I didn’t use spray paint for that application.)

Once the paint had dried, I grabbed some wire, some crimping beads (basically, I raided my jewelry-making stash), and a staple gun, and came up with this:

The crimping beads were to keep the earrings from all sliding to the center of wire. It actually worked pretty well. Here’s what it looked like with earrings on display:

I liked it pretty well for a while. But it was crowded. And it took a while to put together. I still had three more frames to make, but I had run out of time the day I made it, so the lone frame leaned against the wall. For months. And in that time, I realized a pretty major flaw in the design. Since the frame is completely open, if I missed the wire when I was hanging a pair of earrings back up, the earring would slip behind the frame and fall to the ground. Which happened far too often. I’m sad to say that I still have random earrings lost behind my dresser.

So I decided to call a redo when I saw this (originally from here):

I used a pair of needle-nose pliers to rip out the wire and staples. Then I went to the hardware store and got this:

It’s a sheet of decorative, laser-cut aluminum called Lincane. (Or maybe the design is called lincane? Not really sure about that, actually.) While I was at Lowe’s, I also picked up a pair of tin snips to cut the metal sheet down to size.

I basically just put the corner of the metal sheet into the corner of the back of the frame and marked the spot where it needed to be trimmed.

Then, I got to snipping. It was way easier than I thought it would be. I expected it to take a lot of effort to cut through the metal, but to my surprise, it was like a hot knife through butter. (Well, maybe not that easy, but pretty close.) I think it was partly because all the holes make the metal perforated. And the other thing the holes made easy was cutting straight lines. It was like a built-in guide. Nice.

See. Easy Peasy.

Then, I just slipped the metal into the back of the frame.

I used the staple gun to secure it in place. I didn’t staple through the metal, but rather into the wood like little tabs to block the metal from falling out the back.

Like this:

Pretty simple, huh?

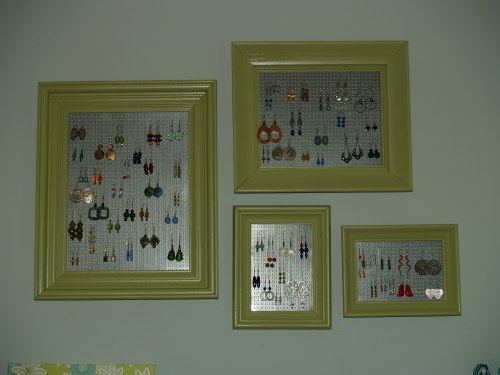
Three more frames filled, and they went up on the wall. And so did all of my earrings.

I’m not totally sure about the configuration of the frames, but I like it, for now.

And now, I don’t have earrings falling behind the frames and down behind my dresser.

I kind of love it. And I kind of love the Pinterest Challenge for giving me the push I needed to get it done. If you don’t know what the Pinterest Challenge is, go check out Young House Love, Bower Power Blog, Ana White, and House of Earnest to see what all the fun is about. And if you’re participating in the Pinterest Challenge yourself, please feel free to link to your own projects in the comments. I’d LOVE to see what you all have been pinning and more importantly, what you’ve been making! Oh, and feel free to check out my boards on Pinterest, and don’t forget to follow me there, too.

I’ve been a very bad blogger. I was starting to feel a little momentum with the blog and motivation to post semi-regularly, and then… I dropped the ball. I don’t have a good excuse, other than that I definitely get spurts of motivation separated by periods of slackerdom. And if I were to try to make excuses, I’d say that I’ve been busy with planning, not one, but two wedding receptions to celebrate my recent nuptials (which were in Mexico) with friends and family who weren’t able to make it to the actual wedding. One reception was in Ohio (where most of my family lives), and one was right here in St. Louis (where Chad’s family lives). But that’s not a good excuse anyway because, if anything, it gave me more projects to potentially blog about — which I intended to do. I wasn’t so diligent about photographing everything, so I’ll have to skip some of the projects, but I’ll show you what I can. Better late than never, right? (Sometimes, I feel like that should be my life slogan.)

Anyway, today I’m going to show you how I made the favors for the first wedding reception (in Ohio). Since most of the people who would be attending the reception weren’t able to attend the actual wedding, I thought they might like a photo from our wedding, but I wanted to do something a little more creative than just sticking it in a frame. So I used a method that I’ve used in the past to make coasters for our coffee table and art for our walls. It started with all this:

In case you can’t tell, that’s a box of white 4 inch X 4 inch ceramic tiles that I got from Lowe’s for about 12 bucks (for 80 tiles), some claw-style picture hangers, Mod Podge and a small paint brush that I had on hand, a bunch of prints of one of my favorite wedding pictures (that I got for 13 cents per print from Costco), and my paper-cutter that I used to trim the photos down to 4X4. Not pictured is a tube of clear kitchen and bath silicone that I used to attach the picture hangers to the back of the tiles.

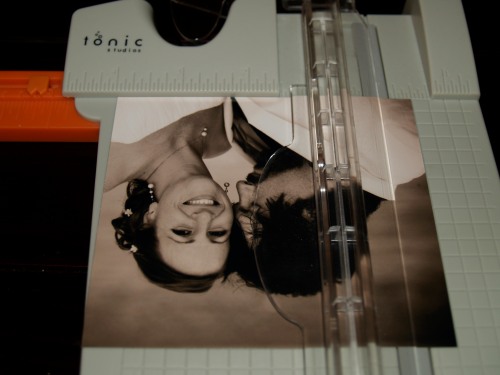
The photos were 4X6, but I needed them to be 4X4, so I trimmed one side with my paper-cutter, then the other side, until they were all the appropriate size.
Then I laid out 50 tiles on my coffee table, with newsprint underneath the tiles to protect the surface of the table.

And I started painting Mod Podge on the tiles, then placing the photos in the center of each tile, making sure to press any air bubbles out from under the photo.

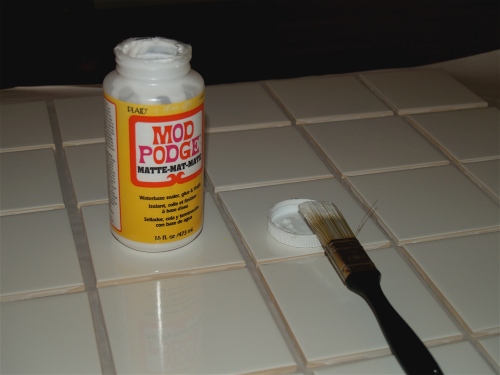
I worked down each column of tiles, painting Mod Podge on three or 5 tiles at a time, then going back and placing the photos before the Mod Podge could start to dry.

As with any project, it probably would have been a snap to do a small group of these, like say 5 or 10. But 50 is another story. It certainly wasn’t hard, but it definitely started to get a little monotonous by time I got to the last few rows.

But finally, I placed the last photo, and I was finished. Sort of. I was finished with that step, at least.

That’s Kiko looking up at me (and my husband’s foot). Cute huh? (The dog, not the foot.)

By the time I finished gluing the 50th picture on the 50th tile, the first tile was dry and ready for the next step, which was to seal the photos by painting over them with Mod Podge. I did this step twice. First, I went over each tile horizontally. After they were dry, I went over each tile again, but this time my brush strokes were vertical. This technique gave the finished product a linen-like texture that I really liked.

If you’ve never worked with Mod Podge, you might not know that the milky white glue dries totally clear. You can see in the next picture that the first column of tiles is almost completely dry already, while the fourth column is freshly painted and still quite wet.
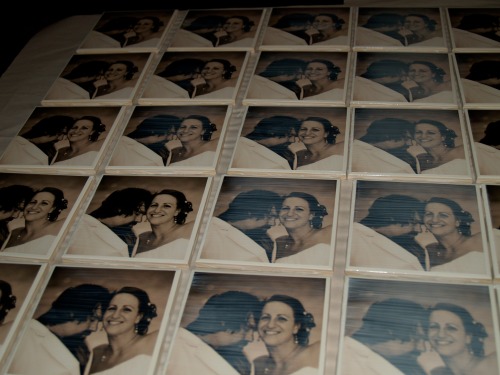
This next picture is to show the dried horizontal texture, before I put the second coat of Mod Podge on using vertical brush strokes. You can see that the Mod Podge is clear, but there is a bit of a textured sheen to it.

Here, I’ve painted the second coat of Mod Podge on, and you can see the linen-like texture. This is still wet, but it’s easier to see the texture in photos that way.

Once all the tiles were good and dry, it was time to attach the picture hangers to the back. I used this kitchen and bath silicone because it adheres to both ceramic and metal. Plus, I already had it on hand. I’m sure you could use E-6000 or some other kind of heavy-duty glue, but I was happy to use the silicone because it’s low odor/low VOC.

The grid on the back of the tiles made it easy to center the picture hanger without doing any measuring.
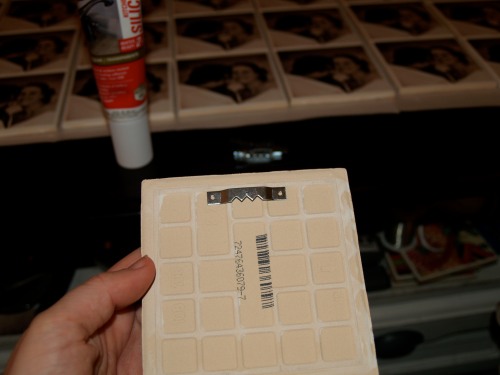
I just squirted a couple dots of silicone in the appropriate places…

And pressed the picture hanger onto it.

I should mention that instead of putting picture hangers on the back, you could just as easily stick a little felt or cork pad in each corner to make a set of coasters. And you can use scrapbook paper or old maps instead of photos (or whatever else you like). Although, I can tell you from personal experience, Mod Podge isn’t totally waterproof. The coasters I made about a year ago using this method are a little worse for wear due to condensation and coffee spills. I might try using diamond glaze or something like that instead of Mod Podge if you are going to make coasters. But for something that is going to hang on a wall, Mod Podge certainly does the trick.
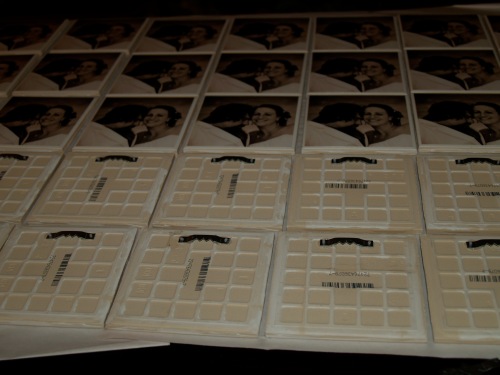
But back to the wedding favors: I just waited for them to dry and wrapped them up in pretty bags that matched my color scheme for the receptions.
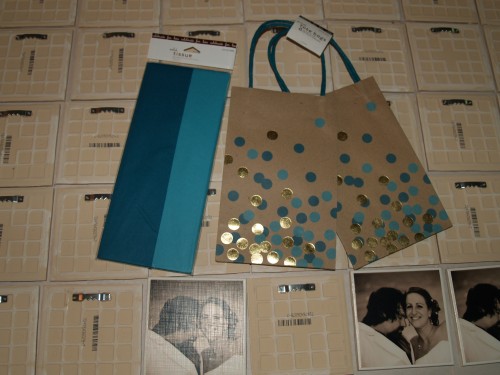
That’s it! I really should have taken some photos of the favors at the reception, but I was busy catching up with family that I hadn’t seen in far too long. But I think everyone liked them. It was a fun project, and a cheap and creative way to give everyone wedding pictures. I think it worked out to about 44 cents per favor (before the bags and tissue paper — and about 80 cents per favor including the wrap job). Not bad, huh?

How about you? Have you ever gone two whole months between blog posts? Or made wedding favors for yourself or a friend? Feel free to link to a post on your blog in the comments (or a picture on Flickr or elsewhere). I’d love to see all the other creative favors that I know are out there!

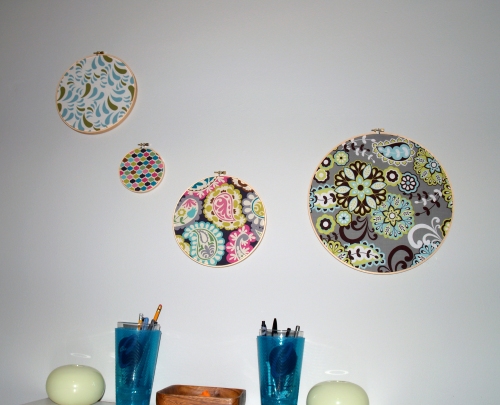
For a while now, I’ve been admiring the clever embroidery-hoops-as-circular-fabric-frames idea that is floating all over Pinterest these days. So much so that I bought a variety of embroidery hoops at Hobby Lobby several months ago, with the intention of completing this project. I just didn’t know, at the time, where in the house it would end up. If you don’t know what I’m talking about, you can see some examples here, here, here, and here. The image below was the first I saw (and pinned) that inspired me to incorporate this idea into my decor somehow.

How’s that for a giant wall-o-fabric-circles? My take on it = much, much smaller scale, but I do love the inspiration.

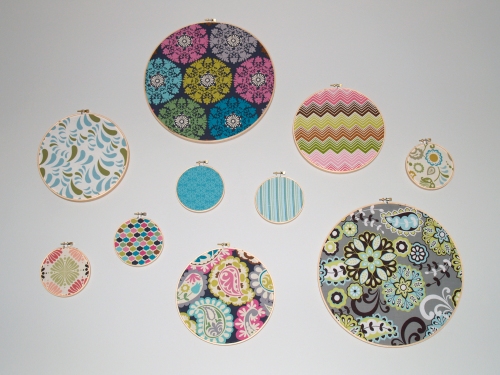
One of the saddest things about my bedroom before I painted it a while back was the lack of art on the walls. So I’m happy to say that I have begun to add art in the form of some cute fabrics that coordinate with the new duvet cover and gray walls (as well as coordinating with one another without “matching” exactly).

I actually completed this project while I was supposed to be cleaning in preparation for the arrival of my best friend and her boyfriend. Somehow I ended up on the floor next to my bed with a stack of fabric, some scissors and a bunch of embroidery hoops. I really don’t know how it happened, but once I started, I couldn’t stop.

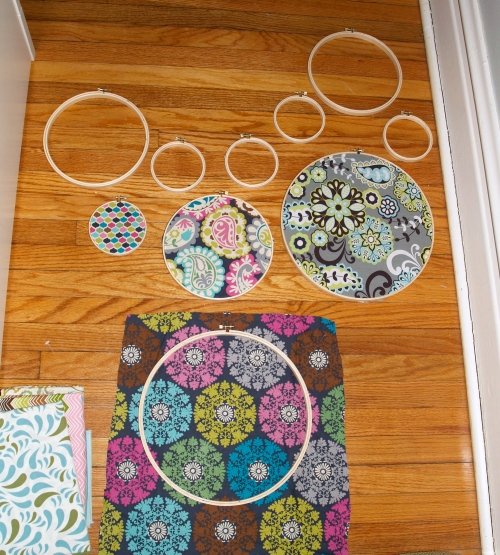
I basically just placed the hoop on one of my fabric choices, cut around the circle, and stretched the fabric in the hoop.

You can see in the picture below that there were some pretty major creases in some of the fabrics. Did I bother ironing? Nope. (Mostly because I’m lazy.) Instead, I just stretched it good and tight and the wrinkles disappeared. Good enough for me.

Once I had all the fabrics in their respective “frames,” I had to deal with the excess fabric that peeked out from the back before putting them on the wall.

First, I trimmed the excess down to about a quarter- to a half-inch around the edges.

Then, out came the glue gun!

I just put a few inches of glue around the inside of the back of the frame and folded the fabric down to stick to the glue.

Until they all looked like this from the back:

Then, it was time to put them on the wall. I wasn’t too scientific with this stage. I just held one up at a time, marked the approximate spot I wanted the nail, put a tiny piece of scotch tape over the marking, and hammered a tiny nail in place. (I have plaster walls, and the tape helps to keep bits of plaster from crumbling when putting a nail in the wall.) Then I just placed the hoop on the nail and moved on to the next one. Easy-peasy.

I moved some of the smallest hoops from one nail to another a few times, but I think I ended up with my original layout in the end. Nope. I went back and checked and a couple are switched in the “final” layout. Now that I see it, I might like the original layout better. Maybe I’ll go switch it. Maybe.

I really love the pops of color, and the circles look like polka dots on the wall. So fun!

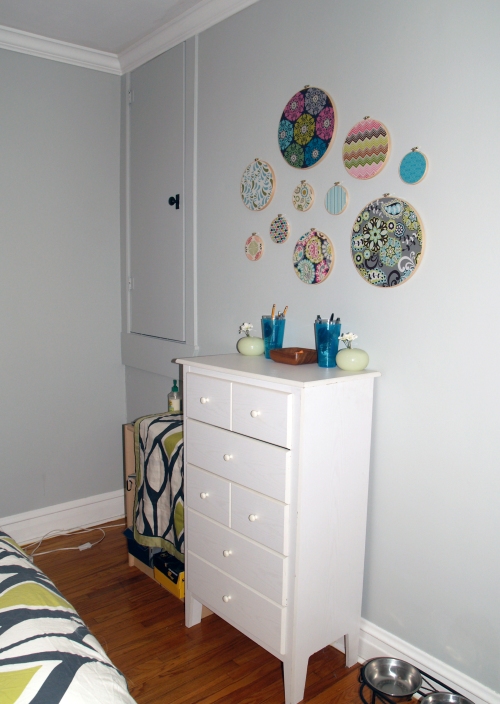
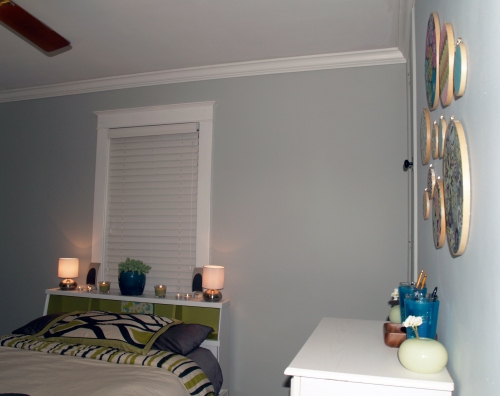
And a view from a little further away, so you can see how it looks with the rest of the room:

That last photo (and the next few) should probably have been part of a different post where I tell you about the headboard that I painted to match my new storage bed (see headboard before painting here), but I somehow lost all my photos of the process. I guess I haven’t quite mastered the organization that having a blog requires. Sad face.

But the headboard is fun, no? I’m pretty happy with how it turned out.

And I really like how the fabrics in the hoops allowed my to bring in some other accent colors to the room. The green is the obvious star, but I really wanted to incorporate some turquoise accents, and the fabrics tie the colors all together.

Here are some more headboard pics for your enjoyment. I guess I’m a little photo-happy in this post. Oh well.

Oh, this next photo reminds me that there is another step that I have planned to really finish this project, but it was not in the cards for a procrastinating-from-cleaning-by-DIYing-some-art kind of project. Can you guess what it is?

If you guessed paint, you’re on the same page as me. I’m thinking that the “New Avocado” (by Valspar) paint that I used on the inside bookcase portion of the headboard is destined to end up on those embroidery hoop frames. I think that it will really bring everything together. But that’s a project — and a post — for another day. Until then, one last look at those cute little polka dots:

What do you think? Do you like the colors and fabrics? How about the headboard? Not bad for a $10 Goodwill snag, huh? And what about painting the embroidery hoops green? Should I skip it, or will the green unify the room like I think it will? Or maybe you think I should paint them, but not green. Do tell. I’m all ears.

988. That’s how many square feet we have. That’s two bedrooms, each with two tiny closets, one small bathroom, a relatively large, but narrow, living room/dining room combo, and a small, but functional kitchen. Our house was built in 1928, so closet and storage space is sparse. The two closets in the bedrooms and a small, half-closet in the bathroom for linens is all we get. No pantry. No coat closet. No hall closet. No extra storage.

So needless to say, storage is an issue for us. Which is why it’s important for us to gain a little storage wherever we can. We look for furniture that can do double duty. Everything has to be functional. Extra functional, even. Which is why we recently got this:

It’s the Queen Brimnes storage bed from Ikea (seen here). The bed was $249, and the slats were another $40, for a total of $289. A LOT less than many of the storage beds we’ve looked at. We snagged it a month or so ago when we took a 5-hour road trip (each way) to the nearest Ikea. We live in St. Louis, and the closest one is in Chicago. We made it a day trip and got tons of stuff, but the biggest and most exciting purchase was the storage bed. And we were definitely in need of a bed, in general. Since we moved into our house, more than a year ago, we’ve been sleeping on our awesome Denver Mattress Company mattress, on the box spring, on the floor. Kind of sad. And a little ghetto. So a bed was on the wish list, but I was waiting to find the perfect storage bed.

I’ve been wanting a storage bed since before we even moved into our tiny, but lovely house because it really just makes perfect sense to me, no matter how much (or how little) storage you may already have. The space under the bed is such a waste. When I was a kid, I used that space, but not effectively. It was basically just the place I shoved everything I could when I was told to clean my room. Then, when I was told to clean under my bed, I had to get a broomstick or something to get all the crap out. Like I said, not effective use of that space.

But the storage bed is perfect. (Or at least, our’s is.) It utilizes all the space under the bed with two huge drawers on each side that allow easy access to everything stored under there. No wasted space. Everyday access. Double-duty furniture. Function!

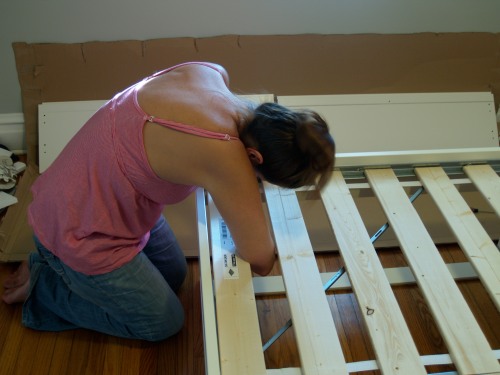
You might have noticed in the picture above that one of the drawer bottoms is white and one is brown. I get to blame that on Chad. I did the majority of the assembly while Chad was out golfing (we both have our hobbies…), but when he came home, he graciously offered to help. Hence, the wrong side of the bottom got assembled on the right side. By the time I noticed, it was really too late to change it without a great deal of effort. Oops. But no matter. It’s just the inside of a drawer, and I will probably end up putting a liner over them anyway. Eventually.

Here are a few pictures of the assembly process, in case you’re interested.

As you can see, it came in three, flat boxes. Gotta love that we were able to get a queen-sized bed from Chicago to St. Louis in our old Subaru Outback.

I organized all the hardware on a sheet pan to keep things contained and easy to find before starting the assembly process. Plus I wanted to make sure I wasn’t missing any pieces.

Besides the mattress and box spring, which I stood on their sides, I had already cleared everything from the room for my recent paint job, so I had plenty of room to assemble the bed.

See all that space? We don’t just get to put a bed on top of it. We actually get to use it! Can you tell I’m excited about storage? Anyway. I think this is about how much progress I had made when Chad arrived and offered to help finish the job.

Just the drawers and slats left now. First, the slats.

That’s me. Once we got the slats in place, we were eager to put the mattress on the bed and see what it was going to look like. We could have used the box spring in addition to the mattress, but the slats make it unnecessary and the bed would have been much to high with the frame, box spring and mattress. So the box spring ended up in the basement. (I guess I should have mentioned that we do have a basement for long-term storage, for which I’m so grateful.)

The drawers were the last thing to assemble. You can see that the drawer with the wrong-side-up bottom was the first to be assembled and put in place.

There I am putting the final touch (the handle) on the last drawer. I can’t really explain why this picture is in black and white, except that when I was going through the pictures, I guess I thought I looked a little less grubby in black and white. Now, I’m not so sure. I’m definitely not a get-all-cute-before-DIYing-stuff kind of girl. But maybe this blog will change that. Maybe.

Here it is all assembled, drawers in. Chad was clearly exhausted by his day of golf and bed assembly.

And there it is all made up. You might notice the mismatched headboard back there. I got that for 10 bucks from Goodwill a while ago. I’ll be back to tell you more about that later.

In the meantime, let me know what you think. Do you have (or lust after) a storage bed of your own? Are you as perplexed as I am that storage beds aren’t the norm? Please dish.